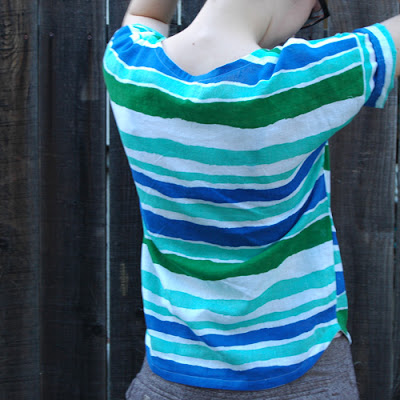
Yeah, I know I missed my dress-per-week thing. I haven't finished it - I underestimated the amount of time it would take, and so here we are. I'm going to try to do a July 4th outfit with it, so hopefully you'll see it then...
Anyway, I felt kinda lousy that I didn't get it done, so in the meantime, here is the very easy tutorial for this shirt I made, which uses just a long skirt or dress:
This tutorial calls for a flared dress or skirt, something at least 35" long, so a maxi dress. You could use something shorter, but you would have to figure out something else for the sleeves. Possibly just bind them?
I am also happy to announce that these instructions can be modified in many ways, including to make this top:
This just requires the addition of a pocket, the lower edge of front being straightened, and a drawstring. It is also made from a knit fabric. The dress in the first version, which is what I took pics of, is a woven fabric, but you can see that the drape is slightly different - also, you'll be wanting the sleeves of a knit version to be tighter than a woven version, so keep that in mind when deciding on a fabric.
Materials:
- Bias binding, for hem and neckline (don't need it for a knit version)
- A shirt with a curved hem to use as a guide
- A maxi dress or skirt, with a skirt that has no seams or anything (except side seams) for 35", and at the hem is half your bust plus 8" to 12". The wider it is, the more pronounced you can make the dropped shoulder. You can use a dress that is tapered like mine was, but 23" up from hem, it has to be wide enough to sit nicely on your hips, since this is where the hem lies. For me, the hem was half my bust plus 2".
Cutting Directions:
In this picture, I've drawn where you need to cut. The whole skirt is folded in half, and what you're looking at is the hem. The neckline starts 5" from center fold, and comes 2" down. The shoulder starts at the top of the neck and comes down in a straight line 2" to 3", depending on the angle that the skirt tapers at - you kinda want it to be roughly a 90 degree angle where the shoulder meets the side.
Cut the side seam out, as close to the stitching as possible.
Now you have two separate pieces.
Take the one for the front and cut the neckline so that in goes down another 3".
Put the pieces back together, and fold down center front again. At the bottom corner of side seams, start to cut a line straight up, parallel to center front. Stop around 12" from top.
This picture shows where you need to cut, sort of... What you want is a 10" place where the sleeve goes, and a gentle curve from the straight line.
If you have a very wide dress, or are doing this from fabric, the curve can be deeper, narrowing the body, which will make the dropped shoulder more pronounced. The striped shirt is like this. Just make sure the hem is still wide enough to be comfortable.
With the remaining fabric, cut the sleeves - fold the tube in half lengthwise.
Sewing Directions:
Sew shoulder seams.
Sew sleeves to shoulders. You may need to cut some excess off the sleeve.
Sew side seams, all the way from hem, around underarms, through sleeves.
Sew binding to outside of hem and neck. Fold under, wrap around raw edges, and sew.
Hope this was easy to understand!


No comments:
Post a Comment